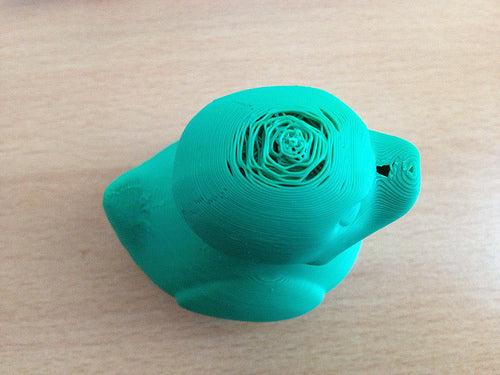
How to fix gaps in the top layers of prints
Share

Gaps in the top layers of 3D prints have a few potential causes including: under extrusion, inadequate infill, incorrect slicer settings, or insufficient cooling. Here are some things you can check to fix the gaps in your top layers:
- First check to make sure that the issue is only on the top layer. If you see that other layers also aren't as full as they should be, you know that your problem is actually just plain old under extrusion. You can find how to fix that in here!
- Increase infill density: Increasing the infill density make it easier for your 3d printer to make a full top layer. Of course, more infill also means increased print time and material costs, but here at American Filament, we're okay with that! =D
- Adjust top layer settings: Check your slicer settings to check that the top layers are set to print enough layers. You may need to adjust the top layer thickness or the number of top layers depending upon your slicer. Printing more slowly on the top layer can help as well.
- Dial in cooling: Inadequate cooling can cause the material to stay liquid for too long, leading to drooping & gaps in the top layer. Adjust your cooling settings to make sure the print is cools evenly and consistently throughout the process.
- Use support structures: If your print requires support structures, make sure that they are properly designed and placed such that the top layers are well supported.
By following these steps, you should be able to fix gaps in the top layers of your 3D prints and create stronger and better looking parts. If you have any suggestions, PLEASE let us and the readers see them in the comments!
