
What are Chromaphanes?

Introduction
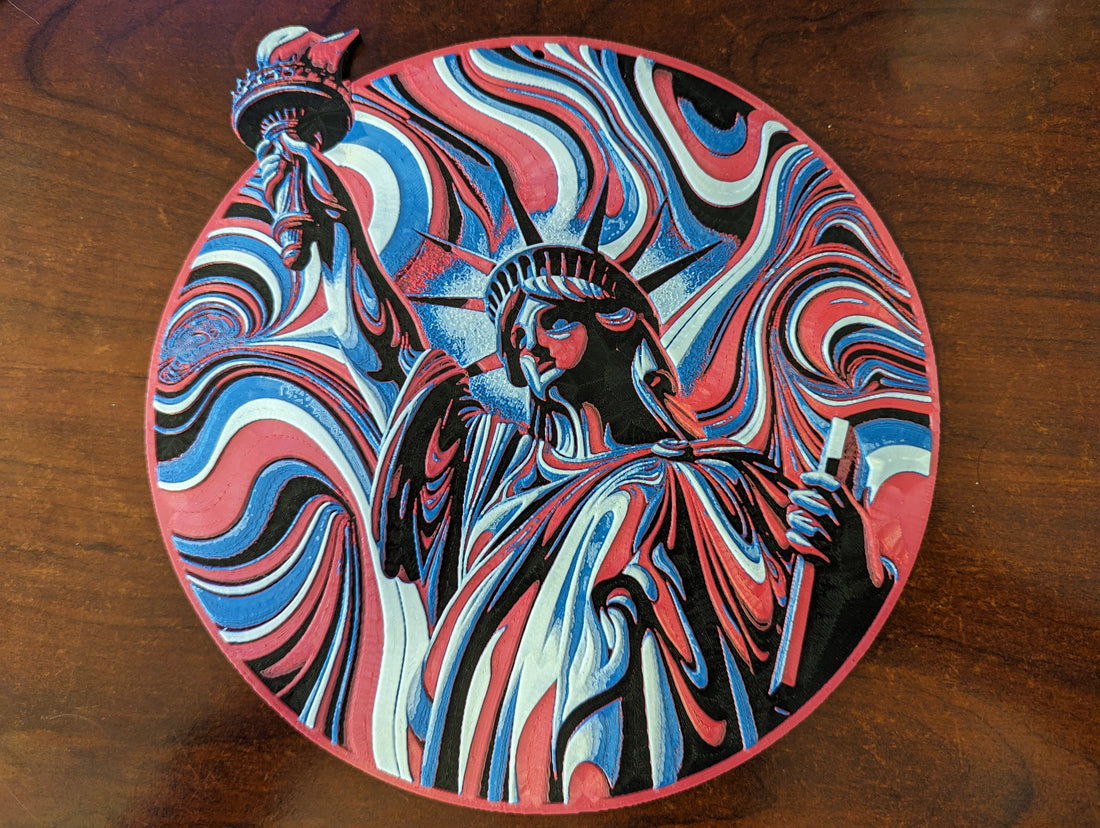
Chromaphanes (also called filament paintings) are an exciting new medium of art where the artist uses a 3D printer and tool like Lithophane Maker Desktop to turn a 2D image into 3D art that has a textured appearance similar to a painting that uses a thick acrylic paint. Chromaphanes are a natural progression from Lithophane Maker's fully 3D printed color lithophane techniques that layer the filament colors in a precise way that will give you a variety of color options, but chromaphanes can be printed without a multicolor 3D printer!
As you can see in the picture below, a chromaphane consists of several "sheets" of filament. Each sheet usually consists of multiple 3D printed layers, but in those layers only one color is present. Therefore, it is possible to print chromaphanes on ANY fused deposition modelling (FDM) printer simply by adding pauses on the correct layers.

How to design a Chromaphane (Filament Painting)

We recommend using Lithophane Maker Desktop as the best filament painting software, because it is so easy to design the best chromaphanes (filament paintings) with this tool. In fact, we love Lithophane Maker Desktop, so much that we've made it available through our own website. Lithophane Maker Desktop can do so much more than chromaphanes. In Lithophane Maker Desktop, you can design lithophanes that cannot be designed anywhere else, as well as many that available through other software programs. Above is a screenshot of the Filament Swap Chromaphane design tool in Lithophane Maker Desktop.
The Filament Swap Chromaphane design tool has several sections including the Filament Library, the Chromaphane Images, the Chromaphane Image Editing section, and the Chromaphane STL Features section.
The Filament Library contains a table of 3d printing filaments which are described by their transmission distance, their color, the filament's name, producer, and material type. You select which filaments will be used in your chromaphane by clicking on their color under the leftmost column "Click Color to Select."
The transmission distance of our filaments have been meticulously measured using a colorimeter, so you should not need to change those values. The transmission distance is related to how transmissive the filament is, and it closely matches the thickness at which a sheet of plastic is completely opaque so that you cannot see any color from the filament beneath it. Glass would have a huge transmission distance while an opaque object would have an extremely short transmission distance.
The filament's color is defined by red, green, and blue (RGB) values. Please note that your monitor does not perfectly display colors. You may have noticed that two monitors next to each other show a picture slightly differently. This is because most monitors are not color calibrated, so you will not necessarily get the same colors in the chromaphane as you see on your screen.
The Chromaphane Images show what the target image (on the left) looks like and the expected image (on the right) looks like. The expected image is the best possible color match of the target image when using the filaments that you have selected from the Filament Library. To load a target image, click on the target image box (the left box). The target image can be adjusted by turning the Chromatic Shift or Chromatic Sundering knobs, to give you pretty much any color combination you want for your image. The expected image will match the target image as closely as possible as you change the target image.
The Chromaphane Image Editing section is where you adjust the target image's color scheme (with the Chromatic Shift and Chromatic Sundering wheels) and adjust the filament options. You can also try various Color Matching Algorithms which will change which colors go in which spots in the expected image. The filaments have two properties: their position and their maximum thickness. The leftmost filament is on the bottom of the chromaphane and the filaments are stacked up from bottom to top in the same order as they are left to right. It's usually best to put darker colors on the left side and lighter colors on the right, but you can also place the colors you want to pop out the most on the right, because they will be on the top of the chromaphane and literally "popping out" to the viewer. You can adjust the position of the colors by using the left and right arrows. The number associated with each color is the thickness of that color sheet. For example, the black "sheet" will be 0.2 mm thick (2 layers at 0.1mm layer height). It's nice to make the bottom color thick to make the chromaphane stiff. If you want to see what the chromaphane would be like without a color, you can make the thickness 0.00. Other than that, you rarely need to adjust the thickness of the color. To remove the color, you can of course click the remove button.
The Chromaphane STL Features section is where you select the color pixel resolution. The smaller this number is, the larger the STL file will be and the more difficult it will be for your computer to slice the chromaphane, but your chromaphane will include smaller features and appear to have a higher resolution. There is a point at which you do not get any additional benefit from lower the color pixel resolution, because your 3D printer is limited in how small of a feature it can print. I like a color pixel value of around 0.2 for the final chromaphane, because my computer can still slice the file well, and it's well below the minimum extrusion width of a 0.4mm nozzle. The Chromaphane Width is of course the width of the chromaphane. The layer height is how tall each layer is assumed to be when the chromaphane STL is sliced. You need this layer height to be consistent with the layer heights in your slicer. Be sure that the first layer is also a multiple of this layer height, so your filament swaps can be done at the right height. Finally, you can select a save location and a folder name. In the folder, you will get the chromaphane STL, a text file containing instructions on the layer heights at which to pause, and the order of the filament colors so you know which order to load them into the printer. Additionally, it will save the expected image, a settings file which you can reload into Lithophane Maker Desktop, and the original image you used.
Chromaphanes benefit from their own slicing profile. You want the top layers of the chromaphane to be at least 1mm thick (to ensure completely solid color mixing layers), and you need the layer heights to be consistent with those you specified in Lithophane Maker Desktop. You need to make sure you put the filament swap pauses at the positions specified in the text file that Lithophane Maker Desktop provides. You may also want to use your slicer to subtract a cylinder out of the STL, so you can hang the chromaphane for display.
Finally, of course, you get to print your chromaphane! Chromaphanes are fun to watch progress, because each time that you do a filament swap you see what it looks like with one more layer added, and you can image what it will look like when complete. I hope you found this guide useful. Enjoy!!
2 comments
Yes, of course! You can use whatever slicer you like. A multi color unit is not required to print chromaphanes so you can use the palette to reduce your labor, but the chromaphane will look the same either way, We are in the middle of a how-to video that will help make the process more clear.
Thanks,
The AF Team
Can I use a palette 3 pro to print a chromaphane ? If so what slicer should I use?